系统自带的几个dialog卖相都不是太好,所有大部分都会使用自定义的dialog。
不过就算自定的dialog有时也有很多不能随心所欲。比如背景模糊,位置,比例等。
因为经常用,这边做下记录
1.去标题
this.requestWindowFeature(Window.FEATURE_NO_TITLE);
| 原来效果 | 应用后 |
|---|
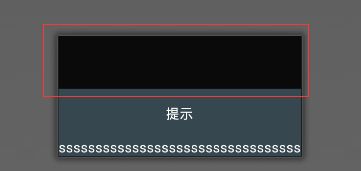 | 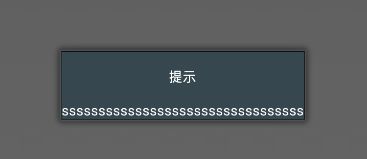 |
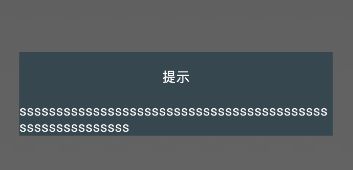
2.去掉周边阴影
padding设为0之后,阴影部分被遮挡而看不见
this.getWindow().getDecorView().setPadding(0,0,0,0);
或使window的背景透明
this.getWindow().setBackgroundDrawable(new ColorDrawable(Color.argb(0,0,0,0)));
3.对齐方式
        WindowManager.LayoutParams attributes = getWindow().getAttributes();
        attributes.gravity = gravity;
        getWindow().setAttributes(attributes);
| 对齐参数 | 对齐方式 |
|---|
| Gravity.TOP | 靠上水平居中 |
| Gravity.BOTTOM | 靠下水平居中 |
| Gravity.LEFT | 靠左垂直居中 |
| Gravity.RIGHT | 靠右垂直居中 |
| Gravity.CENTER | 正中心 |
另外参数可以组合 例如 Gravity.TOP | Gravity.LEFT 为左上角对齐
4.背景透明度
this.getWindow().setDimAmount(f);
f为float类型 0~1,0为完全透明,1为完全不透明
5.设置大小
@Override
public void setContentView(View view, ViewGroup.LayoutParams params) {
int widthPixels = this.getWindow().getContext().getResources().getDisplayMetrics().widthPixels;
int heightPixels = this.getWindow().getContext().getResources().getDisplayMetrics().heightPixels;
params.width = (int)(widthScale*widthPixels);
params.height = (int)(heightScale*heightPixels);
super.setContentView(view, params);
}
这边的 widthScale 和 heightScale 则是相对于屏幕的系数0~1;
例如:
想要一个高宽都是屏幕
$$\frac{1}{2}$$
的dialog则可以这样定义
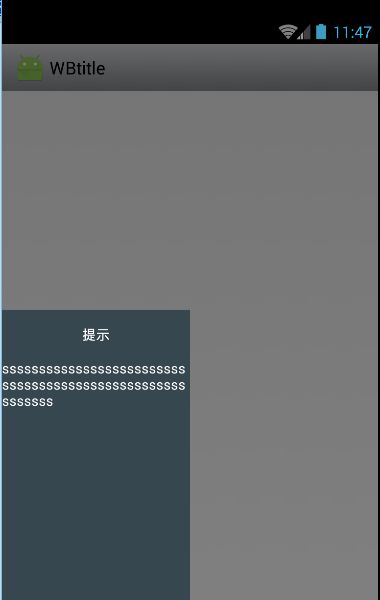
代码如下:
public class TestDialog extends Dialog {
public TestDialog(Context context) {
super(context);
}
@Override
protected void onCreate(Bundle savedInstanceState) {
super.onCreate(savedInstanceState);
this.getWindow().requestFeature(Window.FEATURE_NO_TITLE);
this.getWindow().getDecorView().setPadding(0, 0, 0, 0);
WindowManager.LayoutParams attributes = getWindow().getAttributes();
attributes.gravity = Gravity.LEFT | Gravity.BOTTOM;
this.getWindow().setDimAmount(0.5f);
LayoutInflater inflater = LayoutInflater.from(getContext());
View inflate = inflater.inflate(R.layout.test_dialog, null);
setContentView(inflate,new ViewGroup.LayoutParams(ViewGroup.LayoutParams.WRAP_CONTENT, ViewGroup.LayoutParams.WRAP_CONTENT));
}
@Override
public void setContentView(View view, ViewGroup.LayoutParams params) {
int widthPixels = this.getWindow().getContext().getResources().getDisplayMetrics().widthPixels;
int heightPixels = this.getWindow().getContext().getResources().getDisplayMetrics().heightPixels;
params.width = (int)(0.5*widthPixels);
params.height = (int)(0.5*heightPixels);
super.setContentView(view, params);
}
}
布局文件如下:
<?xml version="1.0" encoding="utf-8"?>
<LinearLayout xmlns:android="http://schemas.android.com/apk/res/android"
    android:orientation="vertical" android:layout_width="match_parent"
    android:background="@color/material_blue_grey_800"
    android:layout_height="match_parent">

    <TextView
        android:textColor="@android:color/white"
        android:text="提示"
        android:gravity="center"
        android:layout_width="match_parent"
        android:layout_height="50dp" />
    <TextView
        android:textColor="@android:color/white"
        android:text="sssssssssssssssssssssssssssssssssssssssssssssssssssssssss"
        android:layout_weight="1"
        android:layout_width="match_parent"
        android:layout_height="0dp" />
</LinearLayout>
